Altered Game Pieces

by Cindy Lyles

Take dominoes to a whole new place using reinkers and stamps.

Supplies
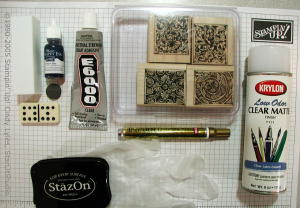
  • Game piece
  • Sanding block
  • Dye ink refill
  • StazOn™ ink
  • Detailed stamps
  • Gold leafing pen
  • Spray sealant
  • Plastic glove (optional)
  • Magnet
  • Industrial cement such as E-6000

Step-by-Step

  1. Step 1

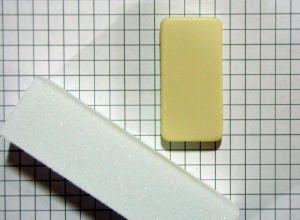
    Using the sanding block, sand the smooth side of the game piece to remove the shine.
  2. Step 2

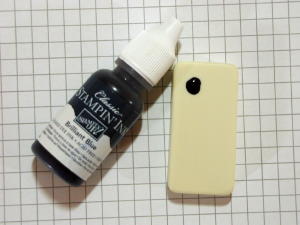
    Place a very, very small amount of reinker onto the sanded game piece.
  3. Step 3

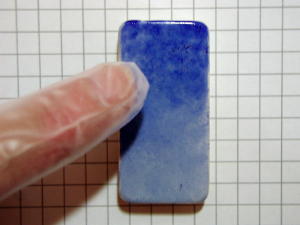
    You will now alter the base color of the game piece. Don the glove if desired. This will prevent your fingers from becoming stained, and the chance of any fingerprints on the piece.

    Blend the reinker on the sanded game piece surface. I chose to have the color fade away versus an even application. If you have applied too much reinker dab your finger onto a baby wipe or paper towel. The reinker will dry almost immediately.
  4. Step 4

    Ink stamp with StazOn™ or other solvent ink. Stamp game piece. Allow to dry.
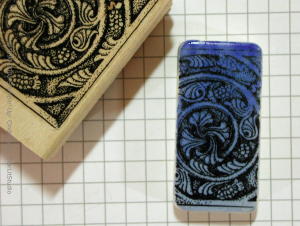
  5. Step 5

    Apply leafing pen to edges of game piece. The chisel tip really does a great job creating a nice edge.
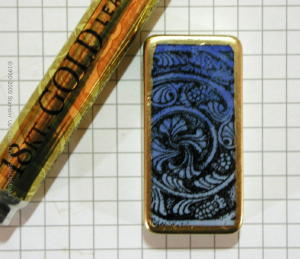
  6. Step 6

    Seal the game piece with a spray sealant.
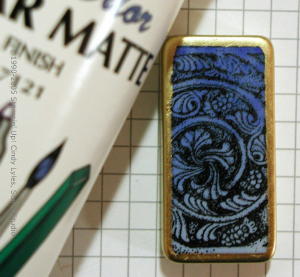

  7. Step 7

    Using E-6000 or other industrial cement, adhere magnet to back of game piece. Allow to dry.

    Tip: If doing multiples of these at the same time, use caution not to place the pieces too close to each other. The magnets will naturally attract each other, and will dry askew and not centered on the back of the game piece.


  8. Step 8 (Optional)

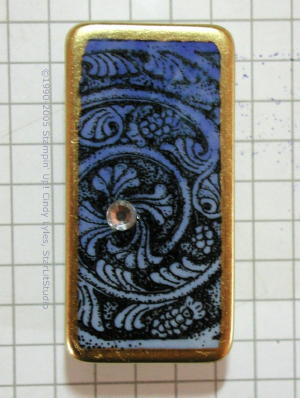
    Add a bauble if desired.

    I found these at Michaels in the bead aisle and adhered with a small amount of Crystal Effects™.


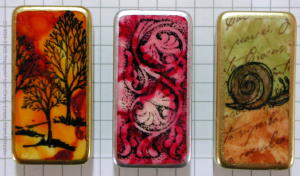
  9. Other samples using the same technique. The snail image from Winged Things uses two classic reinkers. The other two use Pinata Inks and Claro Extender (used to achieve the mottled look). Source: http://www.usartquest.com.
Variations

    Try Embossing
    If you don't mind getting your VersaMark pad dirty, you can also press the game piece into a VersaMark pad, then dip into a vat of clear embossing powder, coating the stamped surface and leafing pen on the edges, and heat set. This latter method tends to leave a visible texture on the surface of the game piece.

Your Turn

You've seen the tutorial, now you try it! We've got a section of the gallery set aside for Altered Game Pieces. Try this technique, then upload your artwork to the gallery. Show us your creations!

***Please note - Internet Explorer/Edge is not a supported browser, and will not allow you to see the videos. Please use Chrome, Firefox or Safari to view our tutorial videos.

Questions and Comments

We'd love to get your feedback or questions. Leave your comment below.

Hello could you please tell me what the magnet is for? to put on a fridge or something. Could i leave off the magnet if the playing pieces were still going to be played with?
shortdrawbryant  |  Mon Jan 21, 2008 at 1:16 PM
Those pieces look great. I work with game design so I love to see artistic work in its final form. Most people wouldn't think a gamer as artistic but art is all around us
Oracle  |  Wed Feb 13, 2008 at 4:09 PM
This is such an awesome idea! These pieces are so beautiful! Rock on!
schmeca  |  Sun Mar 2, 2008 at 7:26 PM
This was 15 kinds of awesome! I tried it today and the dominoes came out absolutely beautiful! Thank so much for this tutorial!
topenga  |  Sun Jun 15, 2008 at 9:40 PM
These are beautiful. I've done a few dominoe pieces before you've inspired me to get them out and do some more!
Jan  |  Mon Sep 15, 2008 at 4:03 PM
Thanks, have also done this before, but haven't done it in a while. So I am inspired to do it again, after I saw the stunning pieces that you made!
Stunning, stunning, stunning!
CRAFTY-LIZ  |  Mon Mar 9, 2009 at 5:10 AM
For a little add on.... I have put matching micro beads on the sides of the dominoes using red line tape. It looks great.
Condor Keeper  |  Sat Mar 21, 2009 at 6:18 PM
This is such a great idea! And since dominoes are my mom's favourite game, I'll have to make time to create a one-of-a-kind gift just for her.
TraceyJean  |  Thu Apr 9, 2009 at 6:23 AM
Quick question. I totally LOVE LOVE LOVE this and it will be perfect for my friends birthday gift. Only problem, is there a way to assure consistentcy so that no one is tempted to cheat? I want to make a whole set for the domino lover in my life, but I could see people remembering which domino is which by the design if I'm not consistent.

Thank you for your answer in advance and WHOO HOO I love it!
audrie  |  Mon May 25, 2009 at 11:38 PM
These are awesome, thanks for sharing!

What Stampinup set do you use? And where do you buy the dominos?
Leah  |  Sun Sep 6, 2009 at 11:34 AM
Hi,
Beautiful pieces!!! Where do you buy the dominos?
Cynthia Windley  |  Sat Sep 26, 2009 at 11:24 PM
You can buy dominoes like this from Wal-Mart, I have a set from there, also game stores have them.

To prevent cheating I would use only 4-6 different prints and choose the dominoes randomly, not in any order or anything to have each print. There will still be enough of the same print on other random dominoes that no one will know which is which.
Cat  |  Thu Oct 8, 2009 at 12:25 PM
I have made dominoes to use as drops with leather cording, which my husband drilled out a hole in the top to thread the cord through. I had not used the gold leaf pen for the edges and I think this would look great. I did use the versa mark pad and EP for sealing. I also used sponge daubers for applying ink blends. Thanks for sharing your ideas.
Sue Manlove  |  Wed Oct 21, 2009 at 9:08 AM
HI

Can you tell me what stamp set you used? It worked perfectly!
lelvis  |  Mon Nov 2, 2009 at 12:58 PM
What kind of drill bit was used to drill the hole in the domino? I have a small drill but I'm afraid to try it since I don't know what the domino is made from. Plastic?
Alene  |  Mon Nov 2, 2009 at 6:53 PM
These look amazing! I didn't realise it was possible to make dominoes by hand, I'm totally inspired to make some now!
Powder Coating  |  Mon Nov 23, 2009 at 8:51 AM
This is AWESOME!!!! One of the coolest things I've seen in a long time. Thank you for sharing!!
Darcy  |  Tue Feb 16, 2010 at 9:30 PM
I have found some very inexpensive white dominoes sets like these at garage sales and estate sales, so I have quite a stash of these. Now I know what to do with them! I've seen them strung together with stretchy cord to make bracelets too.
Donna  |  Sat Mar 13, 2010 at 7:43 AM
I have tried these.. I am however having trouble keeping the ink on the domino. I have sanded them then wipe off. then I add the image with stazon. Here is where to problem comes in .. I try to color in the image and the ink never dries. it has been a week now. also I did the embossed one again the ink is smearing but the emboss stays on . I hope I dont sound like an air head but I had plans for these and just cant get it to work for me
Tracy  |  Fri May 14, 2010 at 3:19 PM
I want to do these for a workshop but the ones I have tried still smear. what am i doing wrong? i sand them, wipe with paper towel, I stamp the image with stazon it seems to stick but when I try to color in the image the clasic will not stay it smears. then i tried the embossing and it seemed to work but again color??? please help I love what you did and would like to do it as well
Tracy  |  Fri May 21, 2010 at 6:56 AM

Page 1 of 2 pages  1 2 >

You need to be logged in to comment

GET OUR NEWSLETTER


Splitcoaststampers's privacy policy