Alcohol Ink Watercolor Background
by Colleen Schaan
Create abstract, watercolor-like backgrounds with alcohol inks and the colorless blender solution.
Supplies
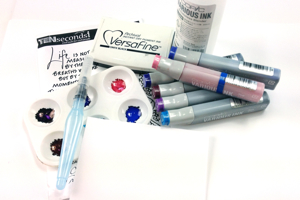
- Aqua brush filled with alcohol blending solution
- 3-6 Alcohol ink reinker (coordinating colors, Copic™ Various Inks used here)
- Paint palette with individual wells
- Paper (Canson Marker Pad used here)
- Stamp set with quotes or phrases (10 Second Studio – “Life” used here)
- Black ink (Tsukineko VersaFine used here)
Step-by-Step
-
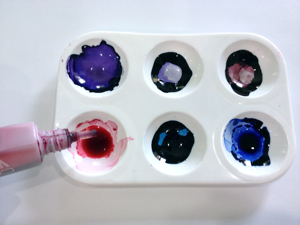
Step 1
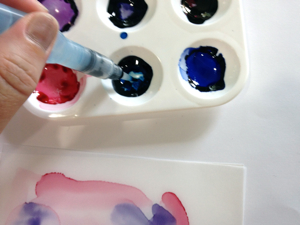
Fill each paint well with 3-5 drops of alcohol ink.
-
Step 2
Slightly dampen brush with blending solution or pure rubbing alcohol. Dip aqua brush into well to pick up ink.
-
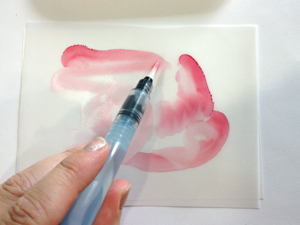
Step 3
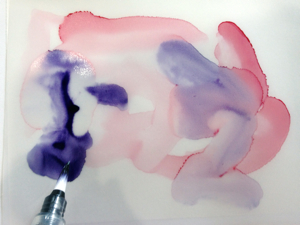
Swipe brush across the paper to apply ink
-
Step 4
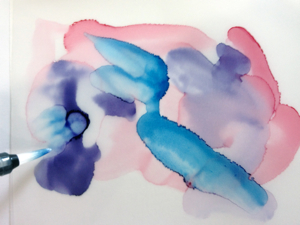
Continue applying ink using a variety of lines, shapes and brushstrokes.
-
Step 5
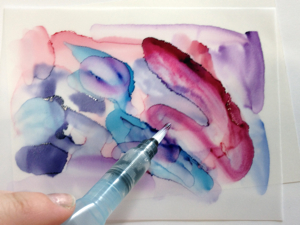
Wipe off excess ink into scratch paper before changing colors.

-
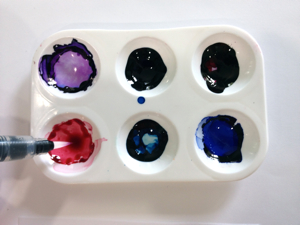
Step 6
Dip aqua brush into ink as necessary to pick up more color.
-
Step 7
Continue to apply layers of color. Rotate the paper so that the brush stokes are more random.
-
Step 8
For lighter washes of color, squeeze out more Colorless Blender solution, for darker shades, dry the brush on scratch paper before picking up ink.
-
Step 9
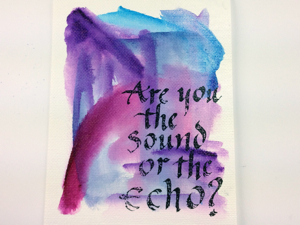
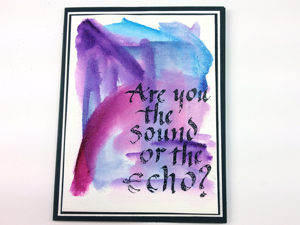
Once dry, stamp a favorite quote or saying onto the Copic watercolored background.
-
Step 10
Layer to complete project.
Video!
Variations
- Use only 3-4 colors on each individual background to help create a unified look.
- Let some of the ink layers dry before adding additional layers for less blending.
- Don’t over-brush the inks or they will muddy.
- Save the paint palette for future use, dried inks can be re-activated.
- Use a variety of surface types for different looks. (primed canvas, metal, acetate, vellum)
- No Various Inks? No problem…swipe a Copic marker across the surface to apply ink and then move it around and paint with the Colorless Blender filled aqua brush.
- Create home décor, greeting cards, scrapbook papers, and/or art journal pages with each unique Copic Watercolored background.
Your Turn
You've seen the tutorial, now you try it! We've got a section of the gallery set aside for Alcohol Ink Watercolor Background. Try this technique, then upload your artwork to the gallery. Show us your creations!
***Please note - Internet Explorer/Edge is not a supported browser, and will not allow you to see the videos. Please use Chrome, Firefox or Safari to view our tutorial videos.

Questions and Comments
We'd love to get your feedback or questions. Leave your comment below.
Yes, that is the #0 refill.
Page 1 of 1 pages