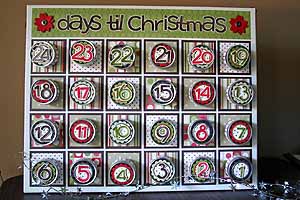
Advent Calendar
by Beate Johns
Make your own Advent calendar to help ease the anxiety of waiting for December 25.
Supplies
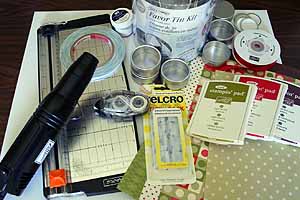
- One 16" x 20" blank Canvas
- 24 metal tins (2" diameter Wilton® favor tins were used here, available at Michaels in the wedding favor section)
- Patterned Paper
- Coordinating Cardstock
- Number and Letter Stamps
- Ink
- Strong and regular adhesive (SNAIL and Terrific Tape)
- Ribbon
- Paper cutter
- 24 Velcro™ dots
Step-by-Step
-
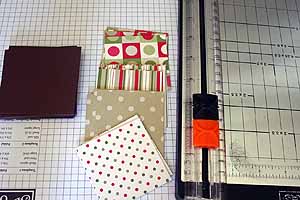
Step 1
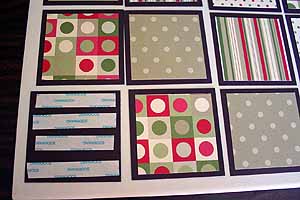
Cut 24 2 5/8" squares of patterned paper and 24 3" squares of cardstock.
-
Step 2
Lay out cardstock pieces in four rows with six pieces each.
Add patterned paper on top. If more than one patterned paper is used, lay them out in the pattern you would like to have when the calendar is finished.
-
Step 3
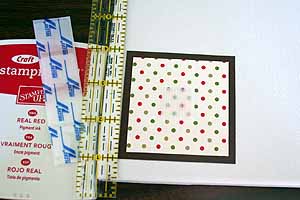
Apply adhesive to the back of the patterned paper.
-
Step 4
Center and adhere over cardstock square.
Repeat with all 24 squares.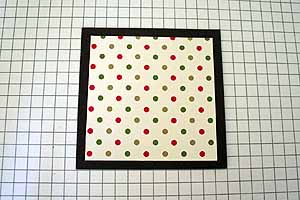
-
Step 5
Apply strong adhesive to the back of all cardstock squares.
-
Step 6
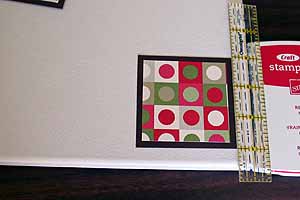
Line bottom left square 1/2" up from the bottom and left side and adhere to canvas.
-
Step 7
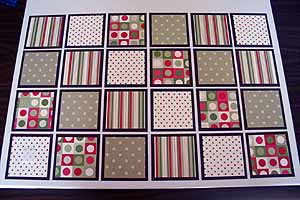
Line bottom right square 1/2" up from the right and bottom edge and adhere to canvas.
-
Step 8
Adhere the remaining squares.
Here, the spacing is 3/8" between each square and each new row.
-
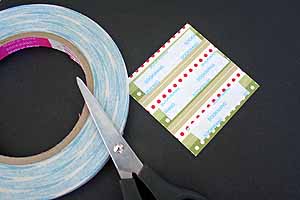
Step 9
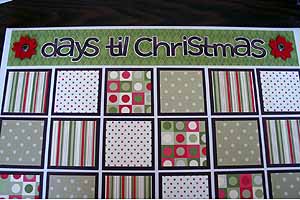
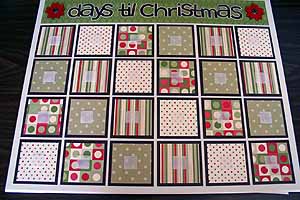
Cut two 2 1/2" x 12" pieces of coordinating patterned paper and adhere them to a 2 1/2" x 18 7/8" long strip of cardstock.
( I cut a 2 1/2" x 12" and a 2 1/2" x 10" piece of cardstock and pieced them together to get my 2 1/2" x 18 7/8" long strip. The patterned paper was taped over the cardstock strip to make it sturdier.)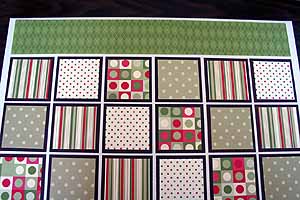
-
Step 10
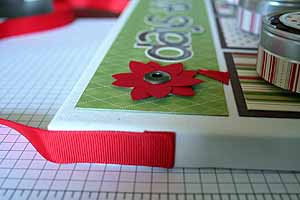
Stamp calendar title and tape down. Add embellishments if wanted. Here, letters were stamped in pigment ink and embossed with clear embossing powder.
Adhere patterned paper strip to the top of the canvas with strong adhesive.
-
Step 11
Adhere a bottom piece of Velcro in the center of each square.
-
Step 12
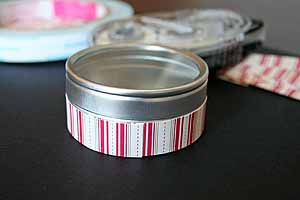
Cut 24 1/2" x 7 1/2" strips of patterned paper.
Add a small piece of strong adhesive on each end and regular adhesive in between.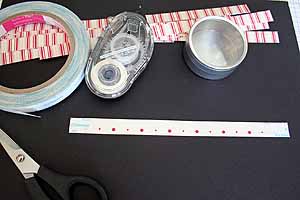
-
Step 13
Tape one of these strips around the bottom of each tin.
-
Step 14
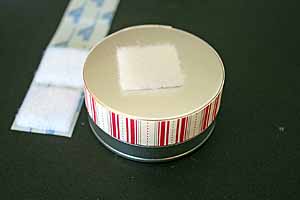
Add one Velcro top on a bottom of each tin.
-
Step 15
Stamp numbers from 1 - 24 and adhere them to the front of your tins.
I stamped mine in Chocolate Chip, Old Olive and Real Red Craft ink and embossed them with clear embossing powder.
I added punched out layered punched out circles under each number.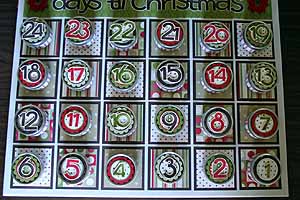
-
Step 15
Stamp numbers from 1 - 24 and adhere them to the front of your tins.
I stamped mine in Chocolate Chip, Old Olive and Real Red Craft ink and embossed them with clear embossing powder.
I added punched out layered punched out circles under each number.
-
Step 15
Stamp numbers from 1 - 24, cut them out and adhere them to the front of each tin.
These are stamped in Chocolate Chip, Old Olive and Real Red Craft ink and embossed with clear embossing powder. Punched out layered punched out circles were layered under each number.
-
Step 16
To hang the calendar, cut two 30" pieces of ribbon.
Add a 1 1/2" long strip of strong adhesive on one end of both ribbon pieces.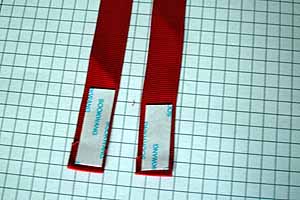
-
Step 17
Adhere ribbon piece on each top side of the canvas board. Reinforce with small nails or thumb tacks if needed.
-
Step 18
Fill the tins and let the count down begin.
-
Step 18
Fill the tins and let the countdown begin.
Variations
Use a magnet board instead of canvas and magnets instead of Velcro dots.
Line the holes of a mini muffin pan with decorated cardstock circles and add goodies inside.
Use paper mache boxes instead of tins.
Your Turn
You've seen the tutorial, now you try it! We've got a section of the gallery set aside for Advent Calendar. Try this technique, then upload your artwork to the gallery. Show us your creations!
***Please note - Internet Explorer/Edge is not a supported browser, and will not allow you to see the videos. Please use Chrome, Firefox or Safari to view our tutorial videos.
Questions and Comments
We'd love to get your feedback or questions. Leave your comment below.
Thanks for posting this it is beautiful
It was fun meeting you at the Portland Regional Seminar!!! (I'm SURE you remember me!!! ;-D )
Your advent calendar is absolutely DARLING!!!!!!!!!!!!!! Soooo clever!!! About how long would you say it took you to make?
Also... I'm wondering if you would be able to put a link to the place you got the favor tins? I looked all over at Wilton.com and couldn't find them! I did a search and these links came up:
1. Baby Favor Kits - These kits are the easiest way to create favors for your baby celebration. All components of the kit are included-you add the filler from the selection of Wilton candy and you're done!
2. Favor Accents - Add special touches to your baby favors, gift tie-ons and table decorations.
3. Favor Bands & Ties - Instant decorations for favors, bubbles, gifts! Tie one on to close filled bags and tulle puffs, or any baby favor.
4. Favor Containers - Perfect as favors–filled with candy and treats, and as gift and cake accents.
5. Favor Accents - Romantic accents add a sparkling beauty and elegance to favors, table decorations!
...but none of them were the little tins! :-( HELP!?!?!?
Hugs,
Barb
Thanks for all you do!!
I am so enjoying these projects - keep this king of thing going!
Thanks,
Kristen
I think that this would be great as a monthly calender, maybe even a monthly reward chart for very active little boys, like my three!
Thanks for the tutorial. What a great and fun project!
Thank you SO much!
thanks for sharing
Page 1 of 4 pages 1 2 3 > Last »