Acrylic Resist
by Shelly Kuck
Create stunning backgrounds with acrylic paints and Distress reinkers.
Supplies
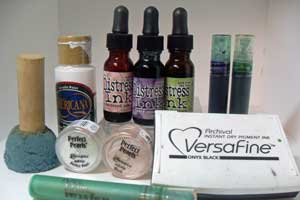
- Distress Reinkers
- Mini Misters
- Perfect Pearls
- Acrylic Paint or Paint Dabber
- Black Ink
- Stamps
- Embellishments
Step-by-Step
-
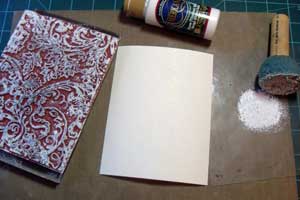
Step 1
Apply acrylic paint to stamp and stamp on Card Stock. Let dry a few minutes.
-
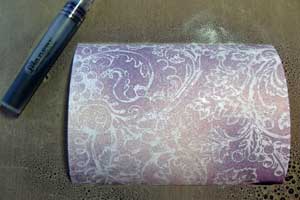
Step 2
Prep work:
Put a FULL dropper of Distress ink in a mini mister, add Perfect Pearls by scooping out on the straw end of the sprayer. Fill mister with water, leaving a small amount of room at the top. Put spray top back on and shake well.
Start with the lightest color and spray the cardstock leaving some open spaces. Place the cardstock on a craft sheet or newspaper.

-
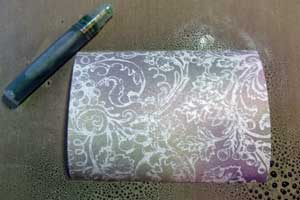
Step 3
Continue to add additional colors of Pearlized Distress Mist colors until desired effect is achieved.
-
-
Step 4
Hint:
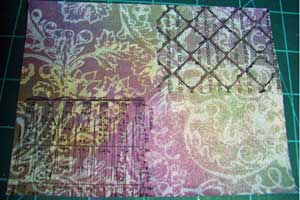
The cardstock may begin to curl as the paper is saturated. It will flatten out when dry, or use an iron to flatten, sandwiching between two pieces of blank computer paper.
The pattern on printed paper can transfer to the wet cardstock.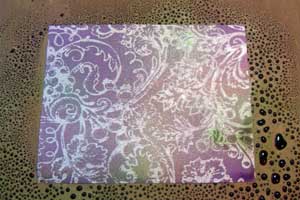
-
Step 5
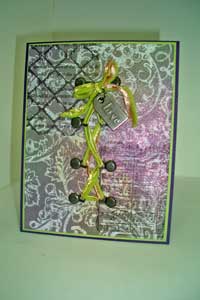
When dry, overstamp images with black ink. VersaFine works great for this as it is an oil based pigment, giving excellent coverage that doesn't smear or bleed.
-
Step 6
Embellish and layer as desired!
Video!
Variations
Less Mess
Try Adirondack Acrylic Sponge daubers for applying your Acrylic Paint.
Substitutions
-You can use regular reinkers. But using distress re-inkers work best because they are a concentrated dye and color stable, so you don't have to use as much ink to get vibrant colors..
-Also, Pearl Ex will work if you seal your project after it dries. (Perfect Pearls have a built in fixative making them ideal.)
Your Turn
You've seen the tutorial, now you try it! We've got a section of the gallery set aside for Acrylic Resist. Try this technique, then upload your artwork to the gallery. Show us your creations!
***Please note - Internet Explorer/Edge is not a supported browser, and will not allow you to see the videos. Please use Chrome, Firefox or Safari to view our tutorial videos.

Questions and Comments
We'd love to get your feedback or questions. Leave your comment below.
Braaa-VO! Love this, lol! Gorgeous look, really, one that takes me back to the days when fiddling with making cool background paper was the main event... I love any resist technique, and this is a new one on me! Thanks so much for sharing! (So, there's really a scoop in my little mister??)
Really, really, liked this...
I only used Adirondack Acrylic Dabbers so far and no problems whatsoever. I love those dabbers.
Happy Easter! Hugs and smiles
Do you mean the Acrylic Paint Dabbers used in the video? Those are from Ranger and you can find them in many online as well as hobby stores. They are called Ranger Acrylic Paint Dabbers if you want to use an internet search engine. I know Eclectic Paperie as well as Inspiration Emporium both carry them.
Page 1 of 1 pages