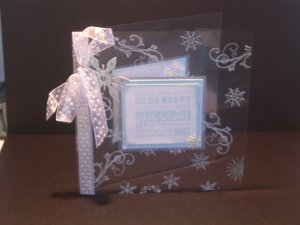
Acetate Card

by Linda Nicholson

Clear cards with suspended elements are certainly eye-catching, and it's easy to wonder where you'd sign them!

Supplies
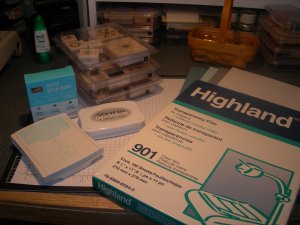
  • Acetate sheet

  • Cardstock for images and matting (Here 2" x 2 ¼" and 2 ½" x 2 ¾" Shimmery White, 2 ¼" x 2 ½" Soft Sky, 2 ½" x 2 ¾" Brushed Silver, 2 ¾" x 3" Blue Bayou)

  • StazOn® or Palette™ Hybrid Ink for stamping on acetate (here Cotton White Staz-On)

  • Ink in color of choice to stamp on cardstock (here Soft Sky)

  • Glue Dots

  • Stamps

  • Soft cloth to wipe away fingerprints/smudges from acetate. (Optional)

Step-by-Step

  1. Step 1

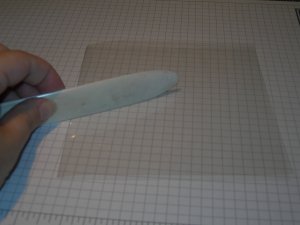
    Cut and score acetate sheet to desired card base size. Here acetate was cut to 5 ¼" x 11” to create a 5¼" square card.

    Wipe away any fingerprints with a soft cloth.
  2. Step 2

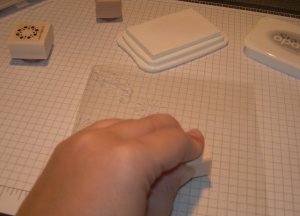
    Stamp stamp images with StazOn™ or Palette™ Hybrid ink on front of the acetate card base. Be careful not to smear images as acetate tends to be a little slippery. Set card base aside.
  3. Step 3

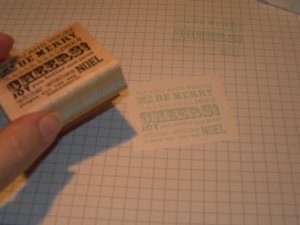
    Take 2" x 2 ¼" cardstock and stamp desired image with classic dye ink. Mat with 2 ¼" x 2 ½" Soft Sky cardstock.
  4. Step 4

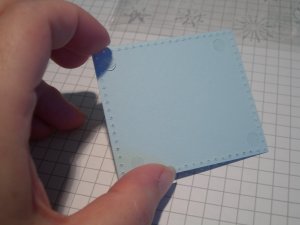
    Apply glue dots to all four corners on the back of stamped image. Center on acetate card base front and attach.
  5. Step 5

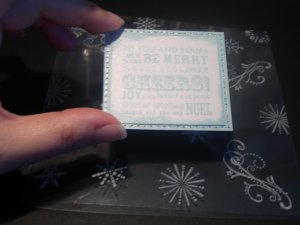
    Open card and apply glue dots directly behind the stamped image panel on the inside front of the acetate card.

    By placing the glue dots directly behind the stamped image, no adhesive will show the next layer is attached. Be careful not to let the glue dots touch the inside back of card.
  6. Step 6

    Take 2 ½" x 2 ¾" Brushed Silver cardstock and attach directly behind stamped image. This will be the third mat layer so take care to mat evenly.
  7. Step 7

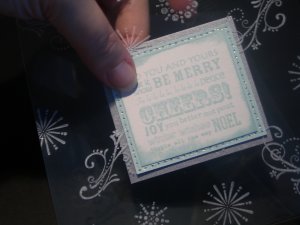
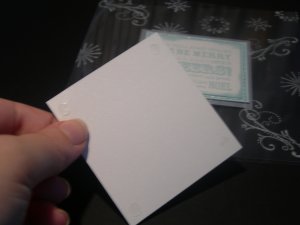
    Take 2 ½" X 2 ¾" Shimmery White cardstock and attach glue dots on all 4 corners. This is where a greeting can be written and will be attached on the inside back of the card base.
  8. Step 8

    Carefully line up 2 ½" x 2 ¾" Shimmery White cardstock and align it so that it is directly behind Brushed Silver layer on the card front. When lined up correctly, this piece will be invisible when the card is closed.

  9. Step 9

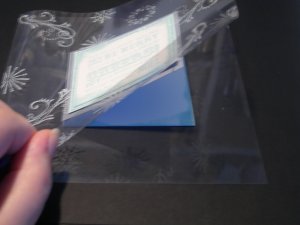
    Flip card over (so back of card base is facing you) and apply glue dots to acetate card base directly behind the Shimmery White cardstock layer.

  10. Step 10

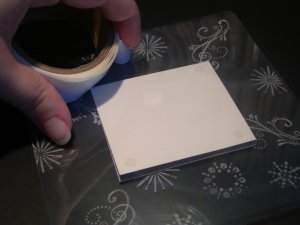
    Take 2 ¾" x 3" Blue Bayou cardstock and attach to acetate, being careful once more to mat evenly (the matting will appear behind the Brushed Silver layer as the Shimmery White layer is hidden).
  11. Step 11

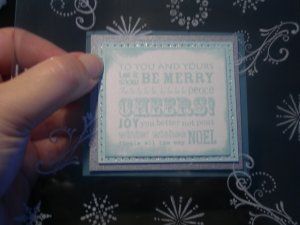
    Embellish as desired.

Your Turn

You've seen the tutorial, now you try it! We've got a section of the gallery set aside for Acetate Card. Try this technique, then upload your artwork to the gallery. Show us your creations!

***Please note - Internet Explorer/Edge is not a supported browser, and will not allow you to see the videos. Please use Chrome, Firefox or Safari to view our tutorial videos.

Questions and Comments

We'd love to get your feedback or questions. Leave your comment below.

CUTE! CUTE! CUTE! VERY CREATIVE
Sandra Meador  |  Wed Jan 23, 2008 at 10:07 AM
I absolutely LOVE this. It's definitely going on my list of things to try. Thanks for the tutorial!
KellyCz  |  Fri Jan 25, 2008 at 7:54 AM
Will SU craft ink work for this technique?
jessthenurse  |  Sun Jan 27, 2008 at 7:59 AM
Jessthe nurse,
Craft ink won't dry on plastic, unless you emboss it. So no, it won't work. You will need Stazon or Palette ink.
beate  |  Sun Jan 27, 2008 at 8:08 AM
Very Elegant. Will have to make one, I have lots of acetate waiting to be used.
SewDelish  |  Mon Feb 4, 2008 at 4:38 PM
I am trying the acetate card as one of the 100 christmas card challenges. I have doe this before and am not sure wy it is taking so long for the ink to dry. I used pigment ink in white this time. Could that be the reason why? I just grabbed one of my white pads before I saw it had to be one of the above. How long will it take to dry with pigment ink on acetate?
Acetate Card  |  Thu Feb 7, 2008 at 5:04 AM
Pigment ink does not dry on Acetate. You could try to emboss it carefully. But you might get static speckles of the embossing powder everywhere and the acetate might warp.
Sorry! You will need to use ink like Stazon or Palette ink that dries on Plastic.
beate  |  Thu Feb 7, 2008 at 5:27 AM
Thank you for the help. I should have read the instructions more carefully. I will use stazon and I'm sure that ill work Again, thanks.
Acetate Card  |  Thu Feb 7, 2008 at 5:43 AM
Too darn pretty! You did a VERY nice job!
Veronica Torres  |  Fri Feb 15, 2008 at 5:23 PM
I am having great difficulty trying to find acetate paper...could you help with the thickness and such that I would need to use as I'd like to use the acetate as the card base. A few of the office supply stores in my location look at me like I've flipped my mind..... (bummer for me!!! as I know I haven't!!!!!) Thanks!
Perrie Sanders  |  Thu Mar 6, 2008 at 12:07 PM
Perrie,
This appears to be the kind of acetate sheets that we teachers use with our overhead projectors at school. You should be able to buy it at any office supply store or teacher store.
Hope this helps!
S.B.  |  Sat Mar 8, 2008 at 8:14 PM
so as I understand it, there are two card layers on the inside of the card that go directly behind the the card stock glued to the front??-
trish kindberg  |  Wed Mar 12, 2008 at 9:21 AM
You've got it.
Acetate Card  |  Wed Mar 12, 2008 at 2:45 PM
You can use transparency sheets is what I've been told; however, I prefer to use acetate paper. Specialty stamp or scrap stores typically carry it. I know my stamp store sells it but it is pricey. If you need a name and number PM me. Good Luck.
Scrapinnut620  |  Wed Mar 12, 2008 at 2:48 PM
Hi, I just googled the acetate sheet and what I am finding (at least from the package that is shown above) is that it is actually a transparecy film. It is from Highland but it appears that it is exactly what is packaged above. I am finding it pretty much everywhere.
Patricia  |  Tue Apr 8, 2008 at 1:32 AM
I really love your card. Great job. I am new to all this so I really appreciate your tutorial. Can't wait to try it.
cutnglu2  |  Wed Apr 16, 2008 at 9:13 AM
I loved this card and had to make one. Mine was smaller than the demo but looks great! Thanks for the idea!
Lisa1960  |  Thu Apr 24, 2008 at 5:14 AM
I bought a pad of Palette Hybrid Ink, but it barely shows up on my acetate. It does show up on regular paper, though. Any suggestions?
Natalie  |  Sun May 4, 2008 at 1:16 AM
What background stamp did Linda Nicholson use on her acetate christmas card?
Betty  |  Fri May 9, 2008 at 11:00 AM
I've made this type of card & I love the look, however, I really had trouble with static. Is there any trick to lessen the static?
honeysosweet  |  Thu May 15, 2008 at 1:06 PM

Page 1 of 3 pages  1 2 3 >

You need to be logged in to comment

GET OUR NEWSLETTER


Splitcoaststampers's privacy policy