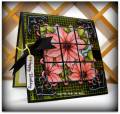
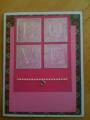
Hi! This card was made for today's Technique Lovers Challenge: Faux Tile. It also fits this week's Stampin' B's Challenge to use a banner on your card.
Well....I saw this technique and thought about Pansies. I haven't colored one yellow yet, so I decided today was the day! I used to have a set of tile trivets that had pansies, and I guess that is what triggered the inspiration to use this set...not quite sure. And, I'm sticking with my "at least one card a day" self imposed ME TIME, too! (Even though I'm really hurting again today. My SIL noted that I was "fussing with my hands" all through lunch. Yes, I was. What was worse, we had gone to see the new Green Hornet movie, (lots of swearing!), earlier in the day, and I was really cold. I was SITTING on my hands more than half the movie.
I have found that it is easier for me to make this type of faux tile by following these steps:
1. Stamp image.
2. Color in image with Copics, making sure the background is colored in.
3. Cut the image panel down to a SQUARE in increments on 1/2". This one is 2".
4. Score the square in 1/2" intervals.Turn 90 degrees and score in 1/2" intervals.(This makes little squares.)
5. Press a VersaMark pad onto the image and emboss in Clear.
6. Press in VersaMark pad again and emboss in Clear.
7. Let cool. Cut on score marks, laying small squares out so that it forms the image.
This worked great! And, it's REALLY shiny! And, it was a lot easier than using the gloss, etc.
Finshed card size: 4 1/4" x 5 1/2"
Total time to complete: 53 minutes
Registered: September 11, 2009 Location: Vancouver BC Posts: 7266
Wed, Jan 26, 2011 @ 9:04 PM
I can't imagine keeping those widdle tiny tiles straight, I'd have something like my dog sweeping his tail across them and never figuring out where they were suppose to go.
------------------------------ ELIZABETH LINCOLN Proud Fan Club Member
I design for CRAFTY SECRETS
My Blog: Paper Pass Times