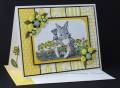
Measurements: Strips - 1” x 3 7/8”, black piece under the strips – 4 x 5 ¼”, 2 3/8 x 3 5/8” with a 1/8” (yellow) and 1/16” (black) borders.
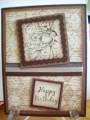
-I used the negative effect embossing technique for the Cuttlebug embossing, check the Techniques Challenge master thread for directions or click here.
-Prismacolor pencils, baby oil and paper stumps for coloring the image and the punched flowers. Image is mounted on foam tape.
-Paper sculpting was done on the flowers and black centers. Fiskars punches for the flowers and large centers, Cuttlebug Floral Borders die cut for the small flower centers.
-The leaves come on a long strip that could be used as is on the card or cut apart as I did, I got them from an SCS friendÂ…Thanks Judy!
Registered: September 7, 2007 Location: Miamisburg, OH Posts: 43279
Wed, Mar 18, 2009 @ 4:18 AM
PRECIOUS!! What a great background......tapped white craft pad on cuttlebugged folders??? Way cool....howEVER you did it. Your coloring is beautiful - great card!!
Registered: April 22, 2006 Location: SCS in NC Posts: 20914
Wed, Mar 18, 2009 @ 4:36 AM
This is just incredible Rox. I love the way you did the background. What a wonderful way to use your folders. Such great coloring. Thanks for a great sketch...
------------------------------ Dawn B. Anything is possible when you open your heart.... My BLOG
Splitcoast Dirty Dozen Alumni SCS Gallery Moderator Splitcoast Challenge Hostess Teapot Tuesday TEAm
Registered: July 27, 2007 Location: Dublin, Ireland Posts: 132008
Wed, Mar 18, 2009 @ 5:08 AM
I love all those textured embossed strips. What a happy-making card, soft and spring-like. Now I know why I was suddenly finding comments on an old card. Off to make my own now.
Registered: June 2, 2007 Location: Virginia, where we have the beach and mountains all in one state!! Posts: 887
Wed, Mar 18, 2009 @ 5:39 AM
Roxie, this is just adorable!!! But I can't find the "Negative embossing technique for the Cuttlebug embossing" tutorial under the resource/technique. Can you help?