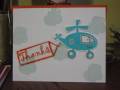
The cuttlebug smoosh, ink embossing, & inking the negative are all the rage right now, so I thought I'd try something similar. We could call it 'hot cuttlebug embossing' since you'll need your heat gun. It's really very similar to those other techniques but you use Craft ink and add embossing powder after you cuttlebug it. Here's how:
1. Cut cardstock to size (I used Naturals White) (if you cut roughly larger than you want then you can trim later for pristine edges (the paper stretches during cuttlebugging)
2. Ink desired area of cuttlebug embossing folder with craft ink or versamark--just press your stamp pad all over it; takes a while to get it covered (I used white craft ink-I like the tone on tone.)
3. Add your cardstock to the cuttlebug folder & run it through.
4. Sprinkle clear embossing powder on your newly inked cardstock.
5. Heat gun it.
6. Work another colour of ink into the cracks/grooves. (I've used Soft Sky ink & I find ink goes on deepest with a sponge and a reinker, but you could use an ink pad.)
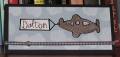
The metal "hello" tag behind the helicopter is made using a dymo aluminum label maker. It's dressed up with cardstock mats, an eyelet & a wire.
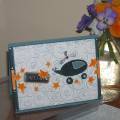
The side pieces are composed of 6 tags punched with SU's tag punches: 4 large tags in Not Quite Navy with Blue Bayou ink over them & 2 small tags in Marigold Morning with Marigold Morning ink over them. Tags are such an easy way to add colour cause there's no precision cutting. :0) The little silver dots are made with a Zig painty pen.
Thanks so much for looking,
:0)
Mel
P.S. for more on how the helicopter was made please see this blog post:
Registered: June 10, 2003 Location: Kirkland, wa Posts: 410
Sun, Apr 27, 2008 @ 12:48 AM
Oh my gosh! What a GREAT card. I just love the background choice and how it mimics the rotor wash of the heli. Love how you used the technique as well.