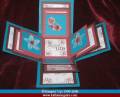
A Surprise Box project which I first saw on SCS from sadiecaity. I wrote my own directions and diagram, then later found hers (duh!). Her directions are in her gallery, here are mine (they are very similar so either one will work for you):
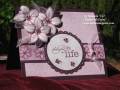
I also just saw these at a stamping convention, where they were called a "Scrapbook In A Box".
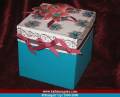
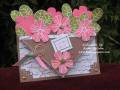
Box and top is basic stamping and cutting, layering, etc. I "watercolored" the images with re-inkers and an aqua brush. I made the flowers on the box's top by hand cutting them and then curling them by placing my middle finger's nail on the under side of the petal and my thumbnail on the top side of the petal. Beginning at the center of flower, just pull toward the petal's edge. The cardstock will naturally begin to curl. I repeated that until the petals had the curl I wanted. Then, I bent the petal inward slightly (near the center) to give it height and dimension. The flowers were attached with mounting foam tape.
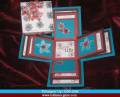
Box Bottom or "Inside": On the TOP layer (the smallest one) I executed one of my favorite little additions in the center of one of the little flowers. I took a piece of ribbon about 3" long and tied it in one knot in the middle of the piece. Then, I punched a hole (1/4" punch) and thredded both of the ends of the ribbon thru the hole. The knot remains on the top of the flower creating a little "bud" center. I secured the ends on the back side of the flower with monoadhesive tape and let the excess ribbon extend beyond the image, giving the appearance of little leaves.
There are 4 photos of this project. This photo is the box completed and folded with the lid on.
sadiecaity said that this project is easier than it looks. Ditto!! Don't let this one fool you. It's really fast and easy and a real "crowd pleaser"!!
Date: Tuesday, February 20, 2007 GMT Views: 363
Favorited:11