I saw a wonderful tutorial on the Vellum Overlay technique by Kelly Acheson at: https://astampabove.typepad.com/my-b...m-overlay.html and just had to try it! Of course I modified it to make it my own, but the tutorial is a great "how to" guide.
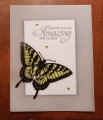
The card base is Stampin' Up! (SU) vellum cardstock, which is stiffer and thicker than typical vellum. I chose to use my retired 2001 SU stamp set "Wonderful Wings" which included this beautiful swallowtail butterfly. In making this card the trick is to EXACTLY line up your vellum and white panel so you can color the image on the cardstock, and heat emboss the same image on the vellum. Kelly has instructions on how to do this.
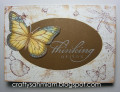
I used Copic markers to color the image on the white cardstock that had been stamped with black ink. I also stamped the sentiment from the SU "Humming Along" set.
Versamark ink was used to stamp the same butterfly image on the vellum. Be sure to liberally coat your vellum with an embossing powder before stamping. The Versamark image was coated with black detail embossing powder, loose powder was tapped off, then heat set.
After coloring the cardstock image with yellows (as is appropriate for a swallowtail), I felt the colors were too muted when viewed through its vellum cover. So I used the same markers to color the BACK of the vellum. This brightened up the butterfly considerably. So note to self: always use images you can color with deep bright colors so you don't have to color the vellum, too.
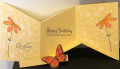
The inside of the card is a folded black panel to which I glued the white stamped panel. It is aligned inside the folded vellum to match up with the vellum image, then attached to the inside back with Scor-Tape (which does a great job of adhering to vellum). The back of the card has a matching black panel attached to cover up the tape inside the card.
A final step was to use clear Wink of Stella to cover all the butterfly on both the front and inside of the card. The card was finished using yellow Swarovski crystals on the front.
I am rating the difficulty of this card as a "3" out of a possible "5" because of the need to take VERY precise measurements, and to carefully align the card base and inside panel.
Date: Friday, April 26, 2019 GMT Views: 558
Favorited:2