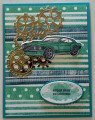
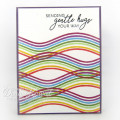
I placed three separate long stamps, each a different design, onto the stamparatus. I inked each in different monotone shades and stamped. I then took the plate off the hinges and lowered it down two hinges and stamped again. Repeated that until I had filled the card stock. I trimmed it to fit an island indigo card base and glued it. I had the gears diecut when I borrowed demo friends stamp and die set. So I glued that next. I had also colored the car and diecut it so I popped it up with dimensionals. Lastly, I stamped the sentiment over an ink blob and die cut it and the layer behind it with layering ovals. I've been wanting to try the stamp shifting ever since I got the stamparatus, so this technique gave me the chance to do that. I will try another soon!
Date: Tuesday, April 23, 2019 GMT Views: 1700
Favorited:4
Registered: December 4, 2010 Location: Minnesota Posts: 16610
Wed, Apr 24, 2019 @ 6:00 AM
What a fabulous masculine retirement card this is! I love this technique you used to stamp the background so thank you for describing how you did this. This is such a cool card and whomever receives it will love it! ~Karen.
Registered: March 13, 2011 Location: Langley, B.C. Canada Posts: 32128
Fri, Apr 26, 2019 @ 11:49 AM
Love it! I did not think I "needed" to get the stamparatus, but now I do. Wonderful background affect with that tool! I love your ink blobbed sentiment. Very cool idea!