Splitcoaststampers.com - the world's #1 papercrafting community
You're currently viewing Splitcoaststampers as a GUEST. We pride ourselves on being great hosts, but guests have limited access to some of our incredible artwork, our lively forums and other super cool features of the site! You can join our incredible papercrafting community at NO COST. So what are you waiting for?
I like to print out my greetings from my inkjet printer. I would like to emboss them but the printer ink dries too quickly to get the powder on.
I am now experimenting with drawing over the printing with an embossing pen and applying embossing powder. So far have tried a Versamark pen and a Whispers embossing pen. Both give too thick a line. A Sakura Quickie Glue Pen which melts into the paper when heated. A Sakura Glaze pen which takes ages and isn't very raised or shiny. Glossy Accents which doesn't come out thinly enough.
Did you try different papers?
When I print on vellum (I guess that's what the name is, this little bit transparent papier) the ink needs a few minutes to dry.
I suspect anything you put over the top is going to leave you disappointed as you'll inevitably lose the crispness of the printed lines.
I've had success embossing inkjet printouts - as Pat says, you may need to experiment a bit to see which settings work best for your printer. I found "normal" print mode was best with my printer. I though "best" quality would be better as it lays down more ink but I found that because it takes longer, the top bit would be too dry by the time the last bit finished. Also, make sure the paper you're printing on isn't too absorbent - a coated card is likely to do better than ordinary copy paper, for example.
My tricks were to have the embossing powder open and ready to go and a piece of scrap paper laid across the output area of the printer so I wouldn't have to handle the piece at all - as soon as it's printed, the powder is ready to sprinkle on and there's something to catch any stray if you're worried about that. Detail embossing powder is best as the smaller grains mean it will stick to something that's a little less "sticky", IYSWIM.
The sentiment on this card in the gallery is the first thing I ever did this way, just so you can see it really can work nicely (this is ancient history but it's the one I'm confident I can locate).
My experiment failed. It looked like it was going to work, but later, I rubbed my finger across the cardstock and it brushed off. Oh well, nothing ventured, nothing gained.
Does anyone know if it works better with laser printers?
A laser printout won't give the powder anything to stick to- inkjet uses ink so you've got a "wet" print area, laser uses toner powder which is bonded to the paper with heat. I think sprinkling embossing powder on paper that's just emerged from a laser printer will give you a hot mess (literally - the warmth in the paper will make the powder cling all over the place rather than stick to the printed area as it would with inkjet).
My experiment failed. It looked like it was going to work, but later, I rubbed my finger across the cardstock and it brushed off. Oh well, nothing ventured, nothing gained.
I'm a little confused by this - you're saying the powder stuck but then didn't melt when you heated it so it brushed off?
A laser printout won't give the powder anything to stick to- inkjet uses ink so you've got a "wet" print area, laser uses toner powder which is bonded to the paper with heat. I think sprinkling embossing powder on paper that's just emerged from a laser printer will give you a hot mess (literally - the warmth in the paper will make the powder cling all over the place rather than stick to the printed area as it would with inkjet).
Thanks Joanne, you just saved me wasting a pile of paper, ink and embossing powder. Much appreciated
I'm a little confused by this - you're saying the powder stuck but then didn't melt when you heated it so it brushed off?
It looked like powder stuck to the words so I used the heat tool but maybe it just blew the piedwer off. I thought it looked shiny but no raised gloss. I rubbed my finger over it and it was smooth.
It looked like powder stuck to the words so I used the heat tool but maybe it just blew the piedwer off. I thought it looked shiny but no raised gloss. I rubbed my finger over it and it was smooth.
You could try heating from underneath to make sure you're not blowing powder off. I'm guessing your powder was either clear or the same colour as your print out (since you had to rub your finger over to tell if there was embossing there or not) which won't be helping you to see whether there's powder stuck.
Until you get the hang of it, I'd suggest trying something like a gold or silver powder on plain black printing - you'll be able to see easily where the powder sticks and the change as you heat it. As the powder is opaque you won't see the black wording once it's melted.
I did use gold embossing powder. And I practically dumped it on before the whole sheet even got out of the printer. I put other paper down in case of a mess, but it was all good as far as that part. I had also changed my printer to best quality. It had normal and draft and best.
The sentiment on this card in the gallery is the first thing I ever did this way, just so you can see it really can work nicely (this is ancient history but it's the one I'm confident I can locate).
I had also changed my printer to best quality. It had normal and draft and best.
As I said above, I found that best quality didn't work as well for me as normal because of the extra time it takes to get the ink on the page (the start is dry by the time the end is done printing). I never tried draft as that tends not to be a crisp print in any case so I couldn't see how the embossing would be sharp. Maybe worth a try on "normal" on your printer?
As well as adjusting the print quality, you can also adjust the paper settings. Something like best quality, on a photopaper setting, should put down enough ink for the process to work. I don't know how much you are trying to print, but the more that has to be printed, the greater the chances of the ink being dry before the printer finishes, so its best to go with a single sentiment at a time. I also recommend doing one line at a time, using different settings, then making a note next to it of ink/paper setting- nothing more irritating than getting it to work, then not being able to remember the settings next time!
I'd second Joannes suggestion of a coated/ less absorbent card too.
It also does work very easily on vellum- I've done whole sheets this way, the ink doesn't dry anywhere near as fast as normal papers.
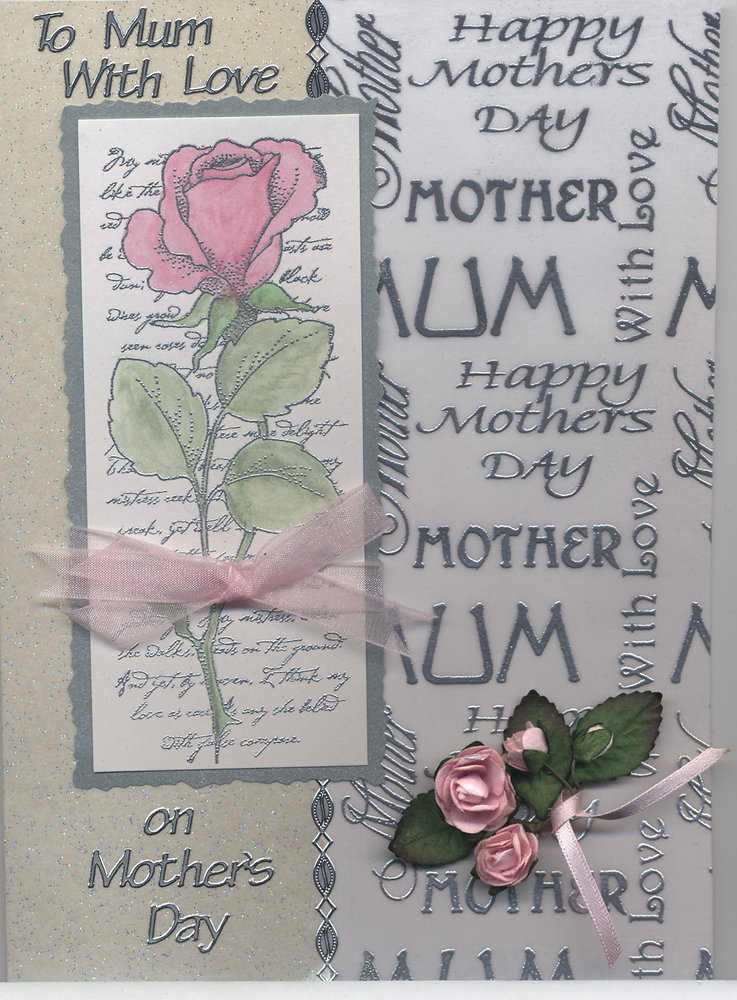
The 'Mothers Day' vellum here was done on an inkjet printer, using a grey colour ink setting and Silver EP.
You'll have the best luck with inkjet embossing if you use non-porous/coated papers such a vellum, glossy cardstock, or matte cardstock that is coated & similar to what matte photo finish cards are printed on. I was able to emboss right out of the printer on gold metallic cardstock, such as Stardream.
Have your embossing powder ready right at the printer & put it on as soon as possible, maybe even as it is coming out of the printer. Just be careful not to get the powder in the printer.
If your ink cartridge is low on ink, your chances of successful embossing are lessened. Using photo quality printing will put more in on your printout but will take longer to print so the first part out has a chance to dry before all printing is finished. Hence apply powder as it comes out of printer.
It takes some experimenting with paper & print quality for successful inkjet embossing.
The 'Mothers Day' vellum here was done on an inkjet printer, using a grey colour ink setting and Silver EP.
Turned out beautifully!
I would say though that printing black is likely to give the best chance of success - gray is achieved by your printer putting less ink on the page so if you're struggling at all to get powder to stick then you're reducing your chances even further by using anything other than a black print out. If your powder is opaque, the colour of the print out is not going to be visible so trying to "match" the colour to your powder isn't necessary.
I have done a bit of this technique - the keys are the paper and speed. Borden & Riley 234 Paris Bleedproof Paper for Pens was recommended to me Amazon.com: Paris Paper 9 x 12 40 Sht Pad, and I've used it successfully - the sentiment on this card is an example with silver EP.
I have also used regular old tracing paper - the sentiment on the teabag on this card. I had to tape the tracing paper to a regular sheet of copy paper as a carrier sheet, but it worked well.
I find a "thicker" font works better than something fine - more ink for the EP to grab on to. Make sure to use an anti static powder pouch as the printer seems to generate a good bit of static. For me, a standard quality setting is a good one - high quality is too slow and the ink dries before you can get it out of the printer. Having embossing powder ready at the printer is key, and heating from the bottom is a good approach, since the inkjet ink isn't as sticky as versa mark or pigment ink. But it works.
Today I tried it on my SU vellum. I still need to work out a few things, but I'm getting there! Do you use the embossing buddy on the paper before you send it through the printer? I didn't because I was afraid the powder might mess up my printer, but now I'm thinking I probably should have. I may have gotten a better imprint. In real life there is a lot of gold specks if you look at it closely.
Yes I use the embossing buddy on the paper first. I haven't seen problems but can't guarantee no harm to the printer will occur. Maybe try a fabric softener sheet if you are worried. I'm glad you are making progress.
Once you have the embossing powder on, you do have time then to check it over and remove any stray specks. Its just getting the powder on fast enough while the ink is wet enough to hold it. I have used my embossing buddy on my paper/vellum, and not caused myself any printer problems with it. I think the other trick is to handle the paper as close to the edge as possible, maybe just with fingernails, if possible. Mine are rarely long enough, lol.
I've done this with regular cardstock, but I sprayed it with a fixative first, then sent it through the printer when it had dried. Works really well. I usually do try to match the colour ink to my embossing powder though. I don't like to have black poking through if my powder doesn't catch a spot.
Good tip, Catwoman. When doing this, try not to go too light with your ink colour though,as it won't put enough ink down for it to work. Guess how I found that out!
I've done this with regular cardstock, but I sprayed it with a fixative first, then sent it through the printer when it had dried. Works really well. I usually do try to match the colour ink to my embossing powder though. I don't like to have black poking through if my powder doesn't catch a spot.
If anyone is still interested in the trace-over-the-printing option, old school erasable pens are embossable and have a fairly fine line. The ink in them dries slowly (I guess that's part of what allows them to erase?), so embossing powder will stick to it nicely. Just make sure it's a regular erasable pen, not the Frixion ones from pilot. And if you are a lefty like me, keep your hand from rubbing over the fresh writing or it can smudge a bit!
A very long time ago (high school), I used an erasable pen to emboss an entire letter to a friend (in gold), a few lines at a time, just because it sounded like fun.